All tagged sewing tips and tricks
In 2015, when I was sewing for a television show, I faced some very tight deadlines. Can you imagine having to sew a button down shirt in under 3 hours? Luckily, I worked with a key seamstress who instructed me how to eliminate some of the steps and get the same final result in order to speed up my sewing and increase efficiency.
Now, I use these techniques in all of my wardrobe sewing and especially to speed up my shirt making. In this post and video tutorial, I'll show you how I button plackets quickly and efficiently by eliminating and combining steps and reducing the amount of fiddle factor that I find in a lot placket sewing instructions. I hope it's helpful for the Fair Fit Method students who are following along and crafting this design, as well as for any of you readers who are looking to learn more approaches to sewing these fine details.
I'm selective of when I pin and when I don't pin. Lots of times, production sewists try their best to not use pins in order to eliminate steps and speed up the process. While I'm all for speed, sometimes pinning can also save me time by ensuring I don't make a mistake that I will have to go back and seam rip.
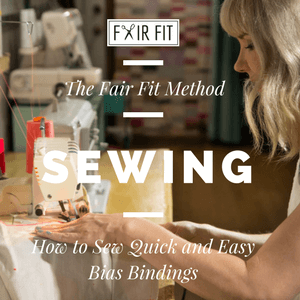
However, when it comes to bias binding I find that pins are unnecessary if you have already gained enough muscle memory and confidence to sew it by placing it as you go. In this post and video tutorial, I'll show you how I sew bias binding quickly and efficiently. While I know there's room to add trimming and clipping, I have also found it's not all that necessary for the result I like. I hope it's helpful for the Fair Fit Method students who are following along and crafting this design, as well as for any of you readers who are looking to learn more approaches to sewing these fine details. My private lesson students have asked for this video tutorial for quite awhile and I'm happy to include it here on the blog so everyone can learn.
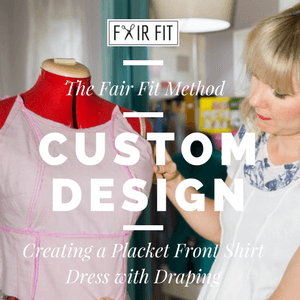
I saw this dress popping up everywhere in my Spring and Summer feeds and knew I had to make a Fair Fit version of it as a personal challenge to adapt the pattern quickly to a seasonal trend. The princess seams in the Fair Fit dress pattern allow for me to easily adapt the design and with draping you can lower the neckline a lot more effectively than just cutting into a flat pattern.
I don't know about you but when I was learning about customizing my patterns I learned the hard way it's not just as simple as cutting the neckline lower. In this post and video tutorial, I'll show you how I use draping to customize the neckline of the Fair Fit dress I'm creating, as well as show you how I am adding a front shirt placket to the design in order to customize it to my specific intention.
Over the years of continuous repurposing, I've found that there are specific ways I cut out a pattern from a repurpose of an existing garment. Lots of times, you can save a whole lot of time if you make sure to save and utilize parts that are already sewn. Especially collars, collar stands, and button plackets.
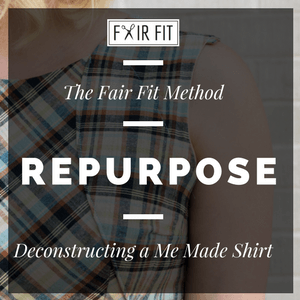
In this post and video tutorial, I'll show you how I took the shirt from this blog post and cut it down to make a Deer and Doe Melilot shirt. This shirt is a piece in my wardrobe that I'm always wearing and knew would be the best use of my fabric. The video will show you how I deconstruct a shirt for repurpose, and you can watch and learn how to deconstruct your own me mades or thrift store finds from fabulous fabric.
The other day I was telling my friend I have a conundrum. For the last few years, I've stopped buying clothes and when I want something new, I sew it up myself. And I have sewn a LOT of clothes, and not all of them ended up being favorites or making it to the monthly rotation. What do you do with self sewn clothes?? I've been striving to minimize how many objects are in my home, and I admit to having an over flowing closet. But donating a me made is not an easy thing.
That's why I've committed to repurposing some of them and making them into new and updated garments. In this post and video tutorial, I'll show you how I took the shirt from this blog post and cut it down to make a Deer and Doe Melilot shirt. This shirt is a piece in my wardrobe that I'm always wearing and knew would be the best use of my fabric. The video will show you how I deconstruct a shirt for repurpose, and you can watch and learn how to deconstruct your own me mades or thrift store finds from fabulous fabric.
Tower plackets can be tricky too, just because they are a few more steps than your conventional lap placket that you find on most shirt sleeves. But knock out a few of them and you will find them just as easy to sew as their quicker cousin. Learning details like these are also an opportunity to practice your own precision and attention to detail in your sewing.
In this post and video tutorial, I'll show you how I sew the tower placket that I added to the Fair Fit dress I'm creating. I hope it's helpful for the Fair Fit Method students who are following along and crafting this design, as well as for any of you readers who are looking to learn more approaches to sewing these fine details.
Have you ever found yourself confused by pop over placket instructions? I have found that if you can combine a few of the steps and knock 2 or 3 of them out at a time, it's much easier and faster and actually makes sewing a popover placket fun. Also, pop over plackets are an opportunity to practice your own precision and attention to detail in your sewing.
In this post and video tutorial, I'll show you how I sew the pop over placket that I added to the Fair Fit dress I'm creating. I hope it's helpful for the Fair Fit Method students who are following along and crafting this design, as well as for any of you readers who are looking to learn more approaches to sewing these tricky details.
Design ease is subjective because the pattern drafter or fashion designer decides how much of it is needed to achieve a specific look and feel with their design. Design ease is defined as how loose or tight a garment fits on the body. When you purchase a sewing pattern, the amount of design ease is already included, which is why sometimes it's best to compare the finished garment measurements with the sizing measurements before you start sewing.
Often, I want to change the amount of design ease to better customize a garment. In my personal sewing practice, I've found that the best way for me to add or subtract design ease has been by draping the garment on my dress form to see how it will fit me. In this post and video tutorial, I'll show you how much design ease I added to the Fair Fit dress I'm creating, as well as show you how I am adding shirt plackets to the design in order to customize it to my specific intention.
Don't get me wrong, there are definitely fundamentals to sewing that you really must learn, practice, and master to get great results with your sewing and work with sewing patterns. But honestly, if enough people complain, and ask why something is done in that certain way, you have to start considering is this rule really necessary? In this post, we will explore why the rules exist, when not to sweat it, and when they really matter.
Today I want to share with you some principles and initial steps to take in the beginning with your sewing pattern that will help you avoid sewing up a garment that doesn't fit. In this article, you will learn how to measure the pieces of your pattern, before you cut it, to increase your likely hood of a successfully sewn garment.