Simple Alterations for A One-of-A-Kind Party Dress
It's the holiday season, you need a dress. If you have a dress... I bet it needs an alteration.
It's the holiday season, and our clients are running to our studio right now with arms full of last minute alterations for the holiday party season. The end of the year came fast, and because alterations and having something great to wear at the last minute seems to be a theme, for our first ever Fair Fit blog post, I decided to show you some easy and fast alterations for a great dress for some of your upcoming events. I decided to grab a little black dress from the thrift store and cut into it to create a wardrobe classic.
Cost for this project: $5.40- One thrift store dress found at the College Street Goodwill in Baton Rouge.
Time for this project: 30 minutes! Maybe less, I was having to take pictures while I sewed :)
Tools: Sewing machine, thread, scissors, pins.
Recommended tools: Serger, Fairgate Curve Stick, Dritz Tailor Pen.
1. First things first. Take off the weird button belt loops on the waist. Those kind of extras add bulk where we don't want bulk. You need to use a seam ripper and go right for the thread where the buttons are attached.
2. Turn the dress inside out and put it on. Pin the seams to make the waist fit.
3. I use the Fairgate Curve Ruler to create princess seams and to help me with most of my alterations projects. It works great because its the ruler used to pattern draft a lot of curves, so when you alter existing already made clothing, it helps keep the seam curves consistent. I use my tailor pen to make the new seam lines, and then I pin it.
4. Because I have a serger, and this is a knit dress, I serge the new waist seams that I just drew with the Dritz pen. But if you don't have a serger, you can also straight stitch these seams, following the lines you just marked to take in the waist.
5. Now put the dress on and mark where you want the hem to be with a safety pin. Take the dress off, and measure the distance from the bottom of the hem to the safety pin. On this dress, we are taking the hem up 6.5 inches. Mark this measurement all the way along the hem, measuring up 6.5 in and marking.
6. After you have marked 6.5 inches, measure down from the 6.5 mark one inch, all along the entire hem. That would be 5.5 inches up from the bottom of the hem.
7. Now cut along the 5.5 inch mark. Then, finish the edge by serging this new cut hem. This provides a finished look and prevents unraveling. You can also use the zig zag stitch on your conventional machine if you don't have a serger.
8. Fold up your hem 1 inch. You can fake a cover stitch hem by using a double needle on your conventional machine. You must sew this on the outside of the garment, all the way along the bottom of the hem. This helps you create a stretchy hem for knitwear.
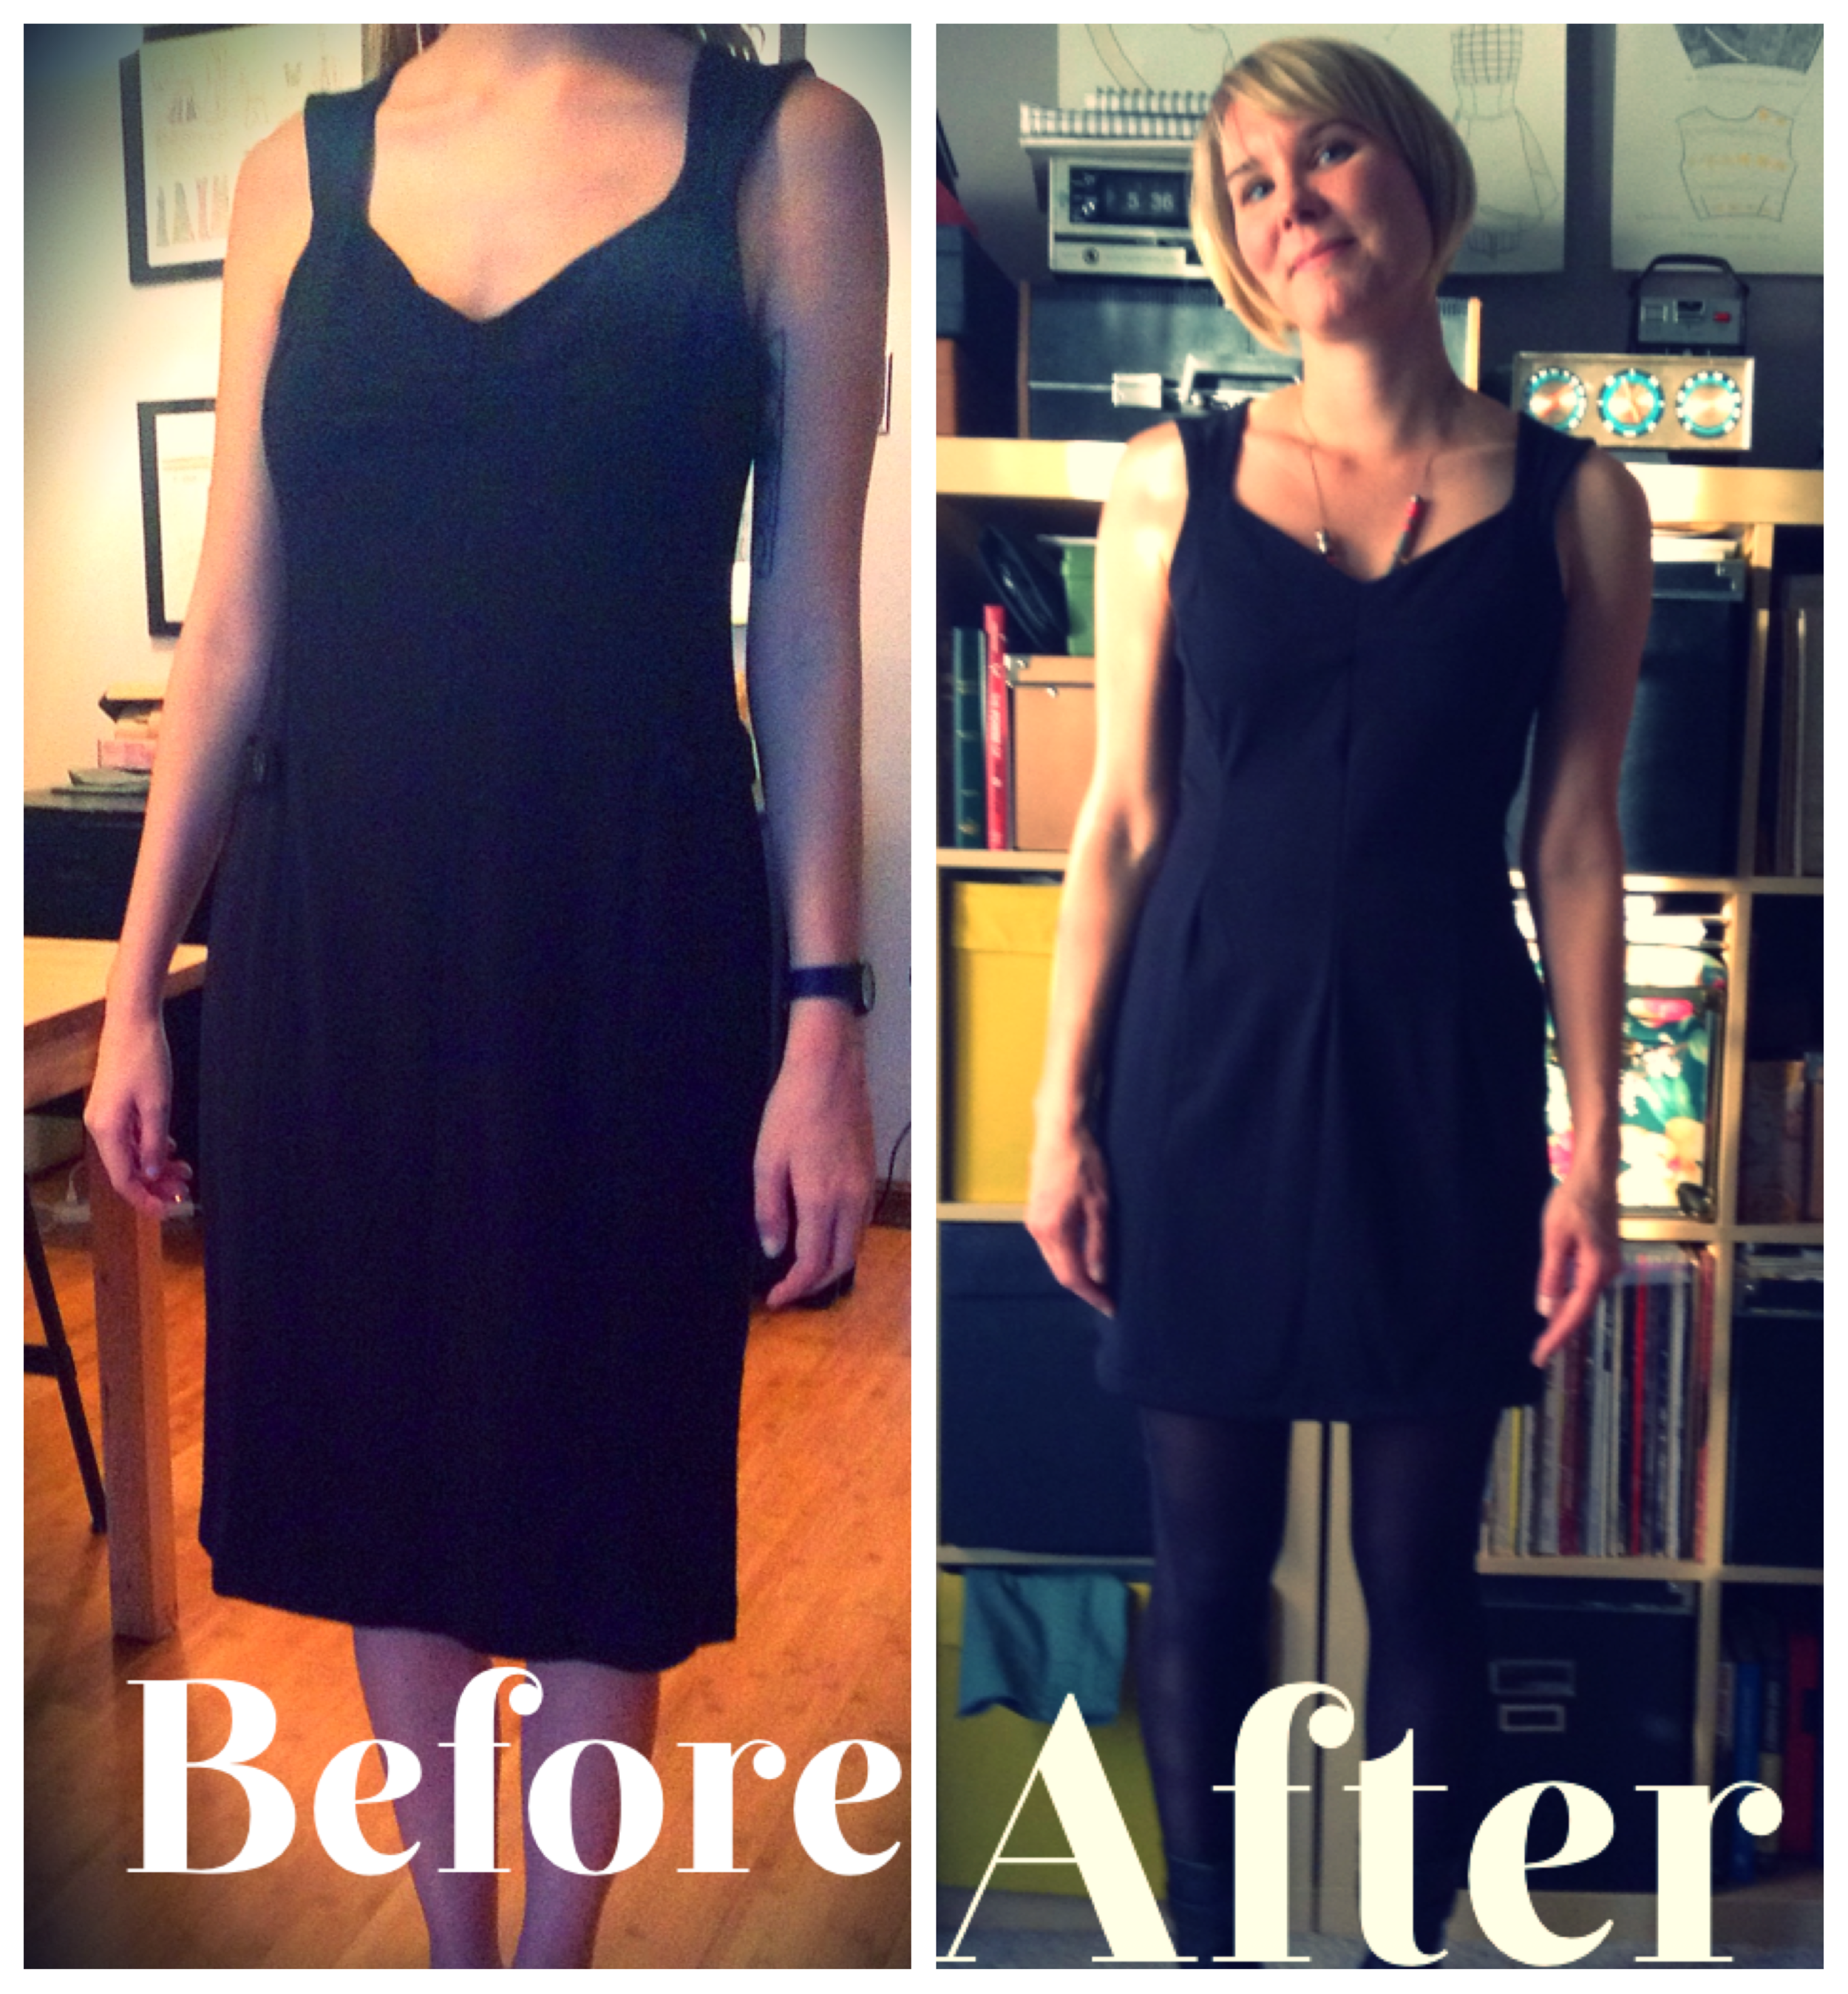
That's it! now we have a classic, little black dress for holiday parties that can be styled a miriad of ways, and worn for many occasions. Above, in the before and after I styled it for a classic cocktail party. But for me, I'm going to wear it with some of my accessories that I made, that's my patchwork belt and leather cowl from my Autumn Winter 2013 collection.
If you liked learning these kind of techniques, and want to see it for yourself and learn how to do these alterations to your own clothes, I want to encourage you to take our alterations class. Learning these skills will save you time and money, and you can start loving what's in your closet again.


