What Can You Do With a Serger? Customize your Sweaters, of Course!
BEFORE AND AFTER: I'm into cropped sweaters this season. I like them kind of boxy, and just above the waist layered over dresses and leggings. That way in this crazy hot and cold weather, it can just be thrown on as an extra layer. Check out how I made this frumpy dumpy thrift store sweater into a cute crop in just 30 minutes.
I've been in search of sweaters lately, even in this crazy Hot and Cold Louisiana winter, I need them as a cover up. But It has to be in the right shape and style, right?
I'm really into knit wear this year, I've been teaching it, making it, and customizing it all of 2014. I want you to love it too! Believe it or not, once you learn how to use a serger sewing machine, and learn some basic construction finishing for knits and stretch fabrics, it's a much faster and easier medium to sew than tailored wovens. And its what we all wear almost every day! About a day ago, I was online searching for a black or gray crop top sweater. Searching, searching, searching. I think what I want isn't in style because I didn't find it, but then I was thinking about what kind of tutorial I would feature this week and customizing a sweater fit right in. I really forget to make things for myself, I've been doing so many projects that I forget to make some of the things I need. In this 30 minute demo, I'll show you a few sweater hacks to change the shape of a sweater or knit tee shirt. And, even if you don't like crop tops, the same techniques apply to any knitwear that you may want to sew. The cuff, bottom ribbing, and sew and stretch demos are a few of the skills I show you in our Sewing with Sergers knitwear workshop. I hope you have a chance to try some of these out while you are practicing at home.
Cost: $3.50
Supplies: A sweater or knit top, a serger, scissors, thread, pins, and a ruler.
Time: 30 minutes or less!
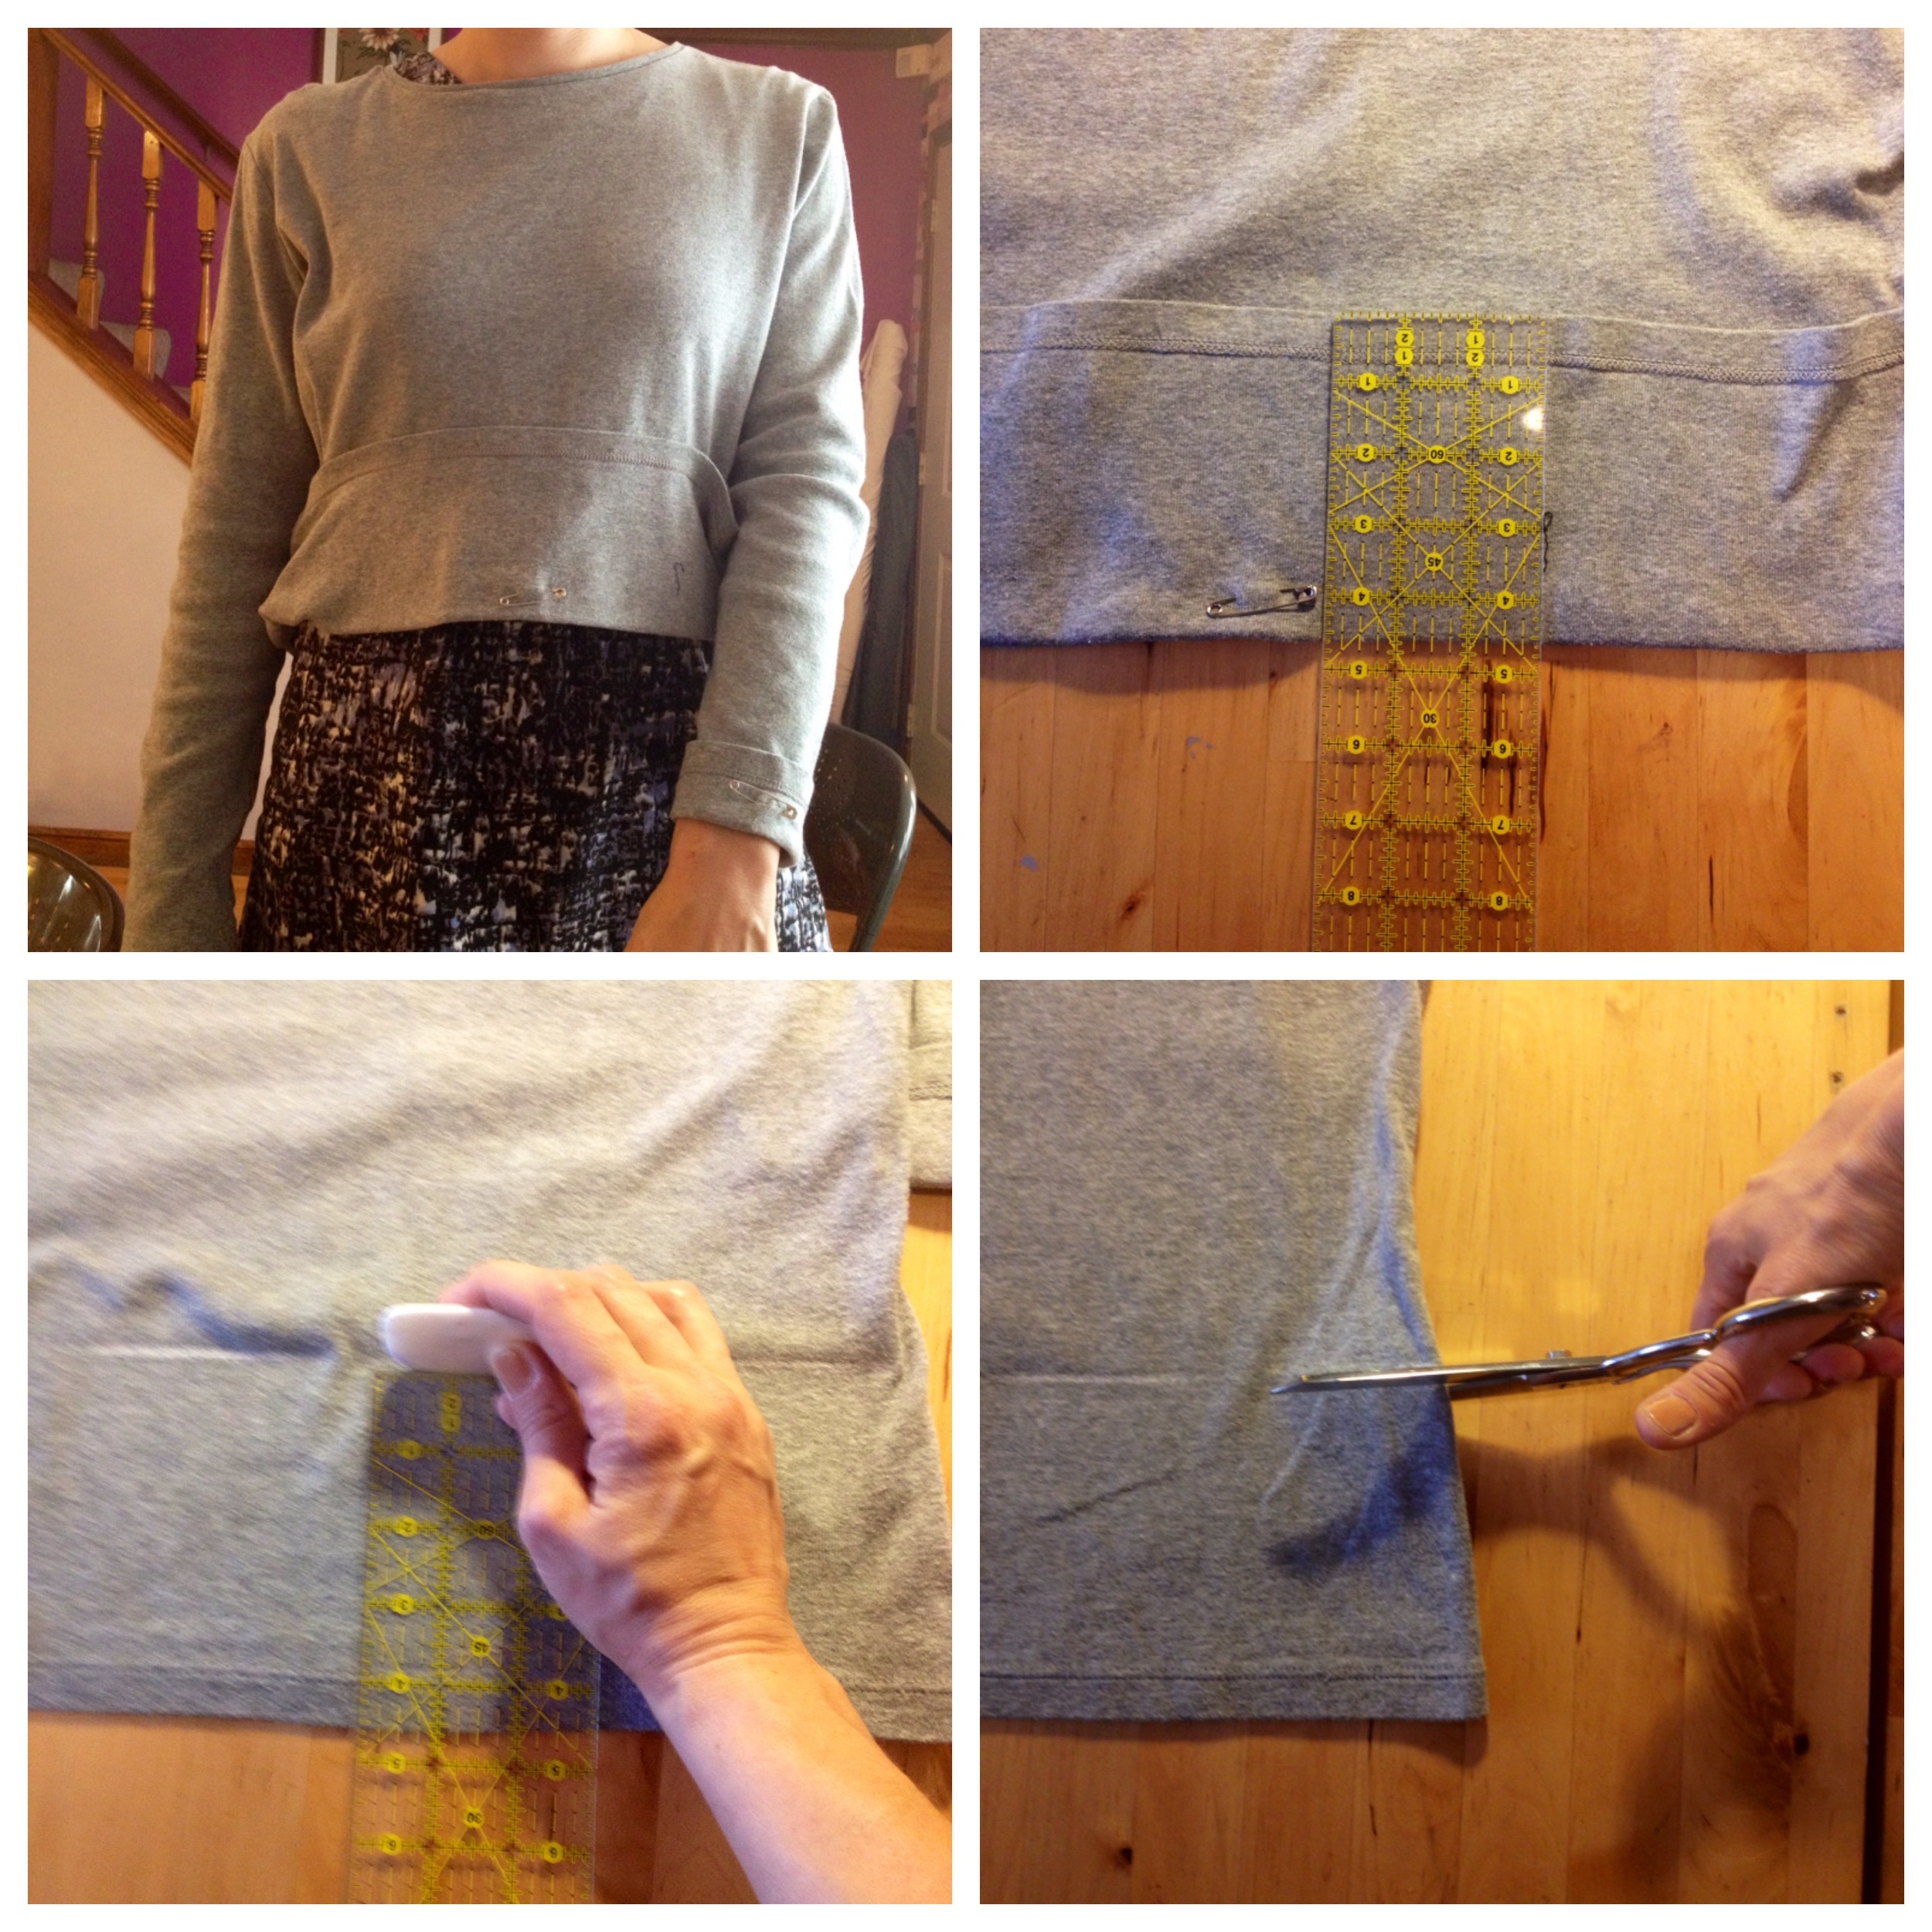
Step 1: Put the sweater on and safety pin where you want the final hem.
Step 2: Lay the sweater out on the table and measure from the new hem to the bottom of the old hem. I measured 4.5 inches for reference in this demo.
Step 3: Mark up from the bottom 4.5 inches.
Step 4: Cut it at the chalk line.
Step 5: Take the bottom that you cut off, and cut off the former hem.
Step 6: Line up the cut bottom piece, with the bottom of the top, and cut off 2 inches from one side.
Step 7: Serge this new cut side.
Step 8: Fold the bottom piece in half. Place it over the bottom of the shirt, and match the raw edges.
Step 9. Match and pin new bottom side seams to shirt side seams.
Step 10: Stretch and pin. Make sure to stretch out all pookies- or puckers- in the fabric. All layers of the fabric must be smooth as you stretch the new hem over the bottom of the shirt.
Step 11: Here's a look at how the pins look and how the placement of the new hem looks on top of the shirt.
Step 12: Serge the hem. Stretch it slightly as you serge.
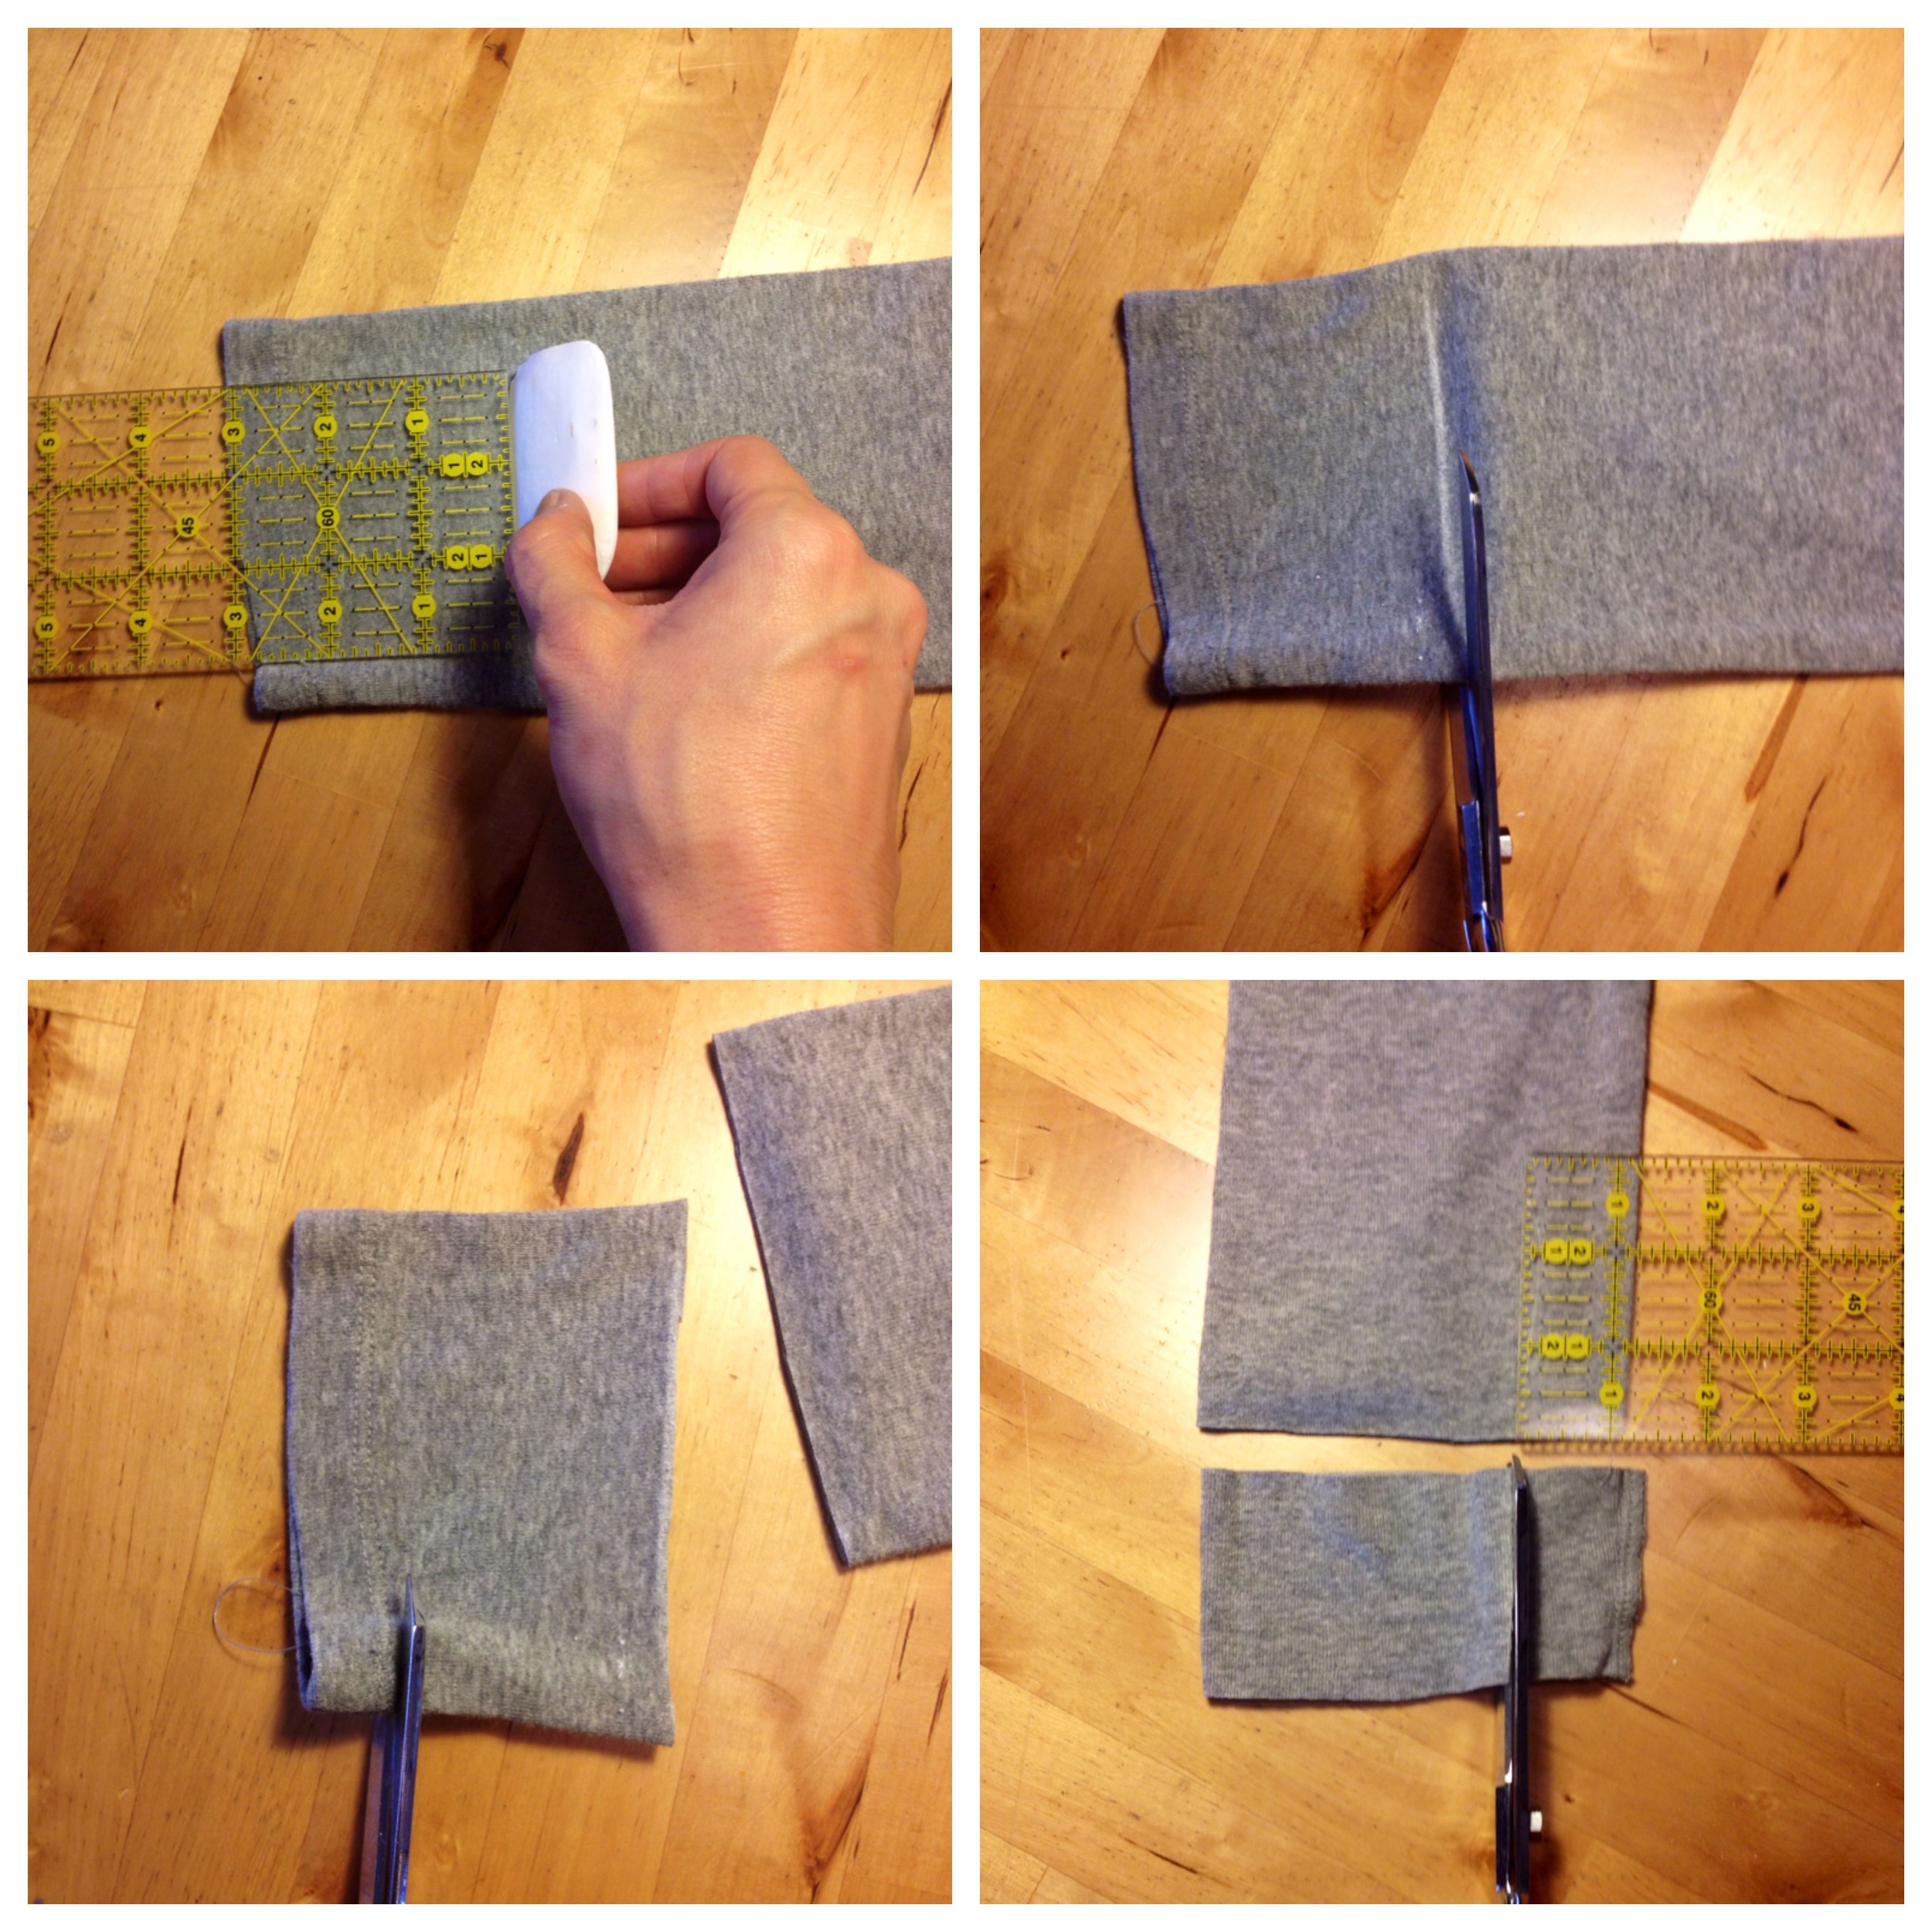
Step 13: Cut off the sleeves where you want the new length to be. I cut off 3 inches in my project.
Step 14: Cut off the old sleeve hem.
Step 15: Cut new sleeve cuff one inch off the side.
Step 16: Serge side of the new cuff.
Step 17: Fold new cuff in half.
Step 18: Place cuff over the end of the sleeve, matching all raw edges and pinning.
Step 19: Serge the new cuff on the sleeve. Stretch as you serge.
TA DA! Here's a look at the final. I'm going to get a lot of use out of this top. You can do this to any knit shirt, sweater, or tee. There are lots of ways to finish off knitwear, use these tips the next time you want to change the length on your top. If you liked this demo, you should check out our Sewing with Sergers knitwear workshop. Every month, we create a different knitwear project, and you will learn how to use a serger. Which if you want to sew knitwear, you are going to want to get one of these! Hello, Santa?


